Disclosure: the post probably contains monetized affiliate links. We earn commission if you buy through them (thanks so much for your support), but you don't pay more for the product.

AeroPress coffee maker.

February 11, 2017

Coffee, Coffee Machines

Brand: AeroPress

Verdict:

AeroPress Coffee Maker

Model: AeroPress Coffee Maker

GTIN: 85A01

You need the AeroPress if you can live with making cup after cup of delicious coffee. It’s quick and easy to use and clean, and saves you money.

This is probably the best product I’ve reviewed to date. It’s a legendary coffee machine, and for good reason. It’s not a mantelpiece, so it doesn’t take center stage in the design department. It also doesn’t churn out coffee by the metric ton.

Like a Lister motor, it keeps plodding along, consistently creating cup after cup of really good coffee. If there’s one product I want you to buy through an affiliate link, it’s the AeroPress. Through my affiliate link, of course.

TL;DR

The AeroPress does not deserve to have a TL;DR section, since this machine excels beyond a stinted list of distilled highlights. But let’s see if it’s possible to give you the short and the sweet.

Easy to Use.

There seems to be this mystic aura surrounding the making of coffee. If that is the case, the AeroPress does a fine job of demystifying the world of coffee. It's super easy to use.

Easy to Clean.

The AeroPress doesn't have intricate parts. It's an almost backwards creation that's easy to disassemble, making it easy to clean.

Makes a Great Coffee.

Unless you're really terrible at making coffee, or unless you're using dirt you've swept up from the floor, your cup of AeroPress coffee is bound to turn out good.

Clean Coffee.

There's not much left in the cup when you've finished drinking your AeroPress-made coffee. Thanks to the filter, coffee ground stays inside the AeroPress, and very little makes it into your cup.

Tough.

Because of its elementary design, the AeroPress is one tough coffee machine. You'll struggle to break this coffee maker.

Quick.

With the AeroPress, you'll have your caffein fix in a few minutes.

Product Attributes

Capacity: 10 ounces.

Color: Gray.

It's available in other colors too.

In the Box

The AeroPress water chamber.
The AeroPress plunger.
The AeroPress filter cap.
AeroPress paper filters.
The AeroPress filter holder.

You'll probably not use this.

The AeroPress stirring paddle.

Once your eye adjusts to your inner coffee level, a normal spoon works fine.

The AeroPress coffee scoop.

You'll hardly use this, if ever.

The AeroPress funnel.

Water chamber.

Plunger.

Filter cap.

350 paper filters (I counted them).

Filter holder.

Stirring paddle.

Coffee scoop.

Funnel.

User manual.

Likes

There’s plenty to LOVE about the AeroPress. Here are just a few highlights.

Great Taste

The AeroPress makes the same quality coffee you’ll find at any coffee shop. Even better. But it’s more sensible to buy an AeroPress than it is to spend all your dough at a coffee shop. Making coffee now becomes more than dumping granules into a cup and overdosing on sugar. You start experimenting with coffee. You start creating your own favorite coffee.

Clean Coffee

The AeroPress filter blocks 90 percent of the coffee grounds (I’m being liberal; it’s more than that). Compare this to a French press, which has you chomping dirt at the last few sips when tasty coffee is critical. Some coffee experts claim that a French press is a terrible option if coffee upsets your stomach. It lets through more than the flavor and some coffee grounds. The AeroPress filters out most of the bad stuff, leaving you with clean coffee. The beauty is, you’re not sacrificing taste. You get a full flavored coffee without the grounds.

Quick

The AeroPress propels you from coffee-less to well caffeinated in a few minutes. This includes boiling water, pouring, pressing, pouring again and cleaning; the whole shebang. But it doesn’t compromise on quality, despite the speed.

Easy to Use

In ten steps you go from coffee-less to caffeinated. And it’s not ten steps into a mathematical marshland. It’s as easy to use as it is to make instant coffee. But much better.

Easy to Clean

In a few seconds your AeroPress is clean and ready for the next round.

Tough

The AeroPress won’t break any time soon. It’s made from thick BPA- and phthalate-free plastic. I dropped it to see whether it would stay intact. It did.

Portable

It’s charming to lose yourself in the food and drink of a foreign destination. But what if you’re visiting a place that’s off the map? No good food; no good coffee. It’s possible, as horrifying as it sounds. The AeroPress saves you, the intrepid traveler, from decaffeinating. It’s like an insulin injection for coffee lovers.

Price

The price of the AeroPress has gone up over the years, but keep in mind, EVERYTHING’S gone up. Your cup of AeroPress coffee will be in line, if not cheaper, than a cup of coffee from a major coffee chain. And it’ll probably be better.

How to Use It

The AeroPress is so easy to use that by the time you’re awake, you’ll think the cup of coffee in your hand was created by a kind coffee fairy. But it wasn’t. It was you, still halfway in slumberland, knocking together a decent cup of coffee BECAUSE this thing is so easy to use.

Water Temperature

AeroPress recommends using water heated to 176 Fahrenheit (80 degrees Celsius). Our old kettle heated water to 206,6 Fahrenheit (97 degrees Celsius) (I measured with a thermometer). We bought a variable temperature kettle. It heats water to 176 Fahrenheit (80 degrees Celsius). I’ve made countless cups of AeroPress coffee with both. My honest opinion? There’s no difference in taste between coffee made at either temperature.

Best Coffee

This is subjective. What I will say is, you need the right grind for your AeroPress. It can’t be too fine, and it can’t be too coarse. AeroPress recommends you use a fine drip or espresso grind. Trust them on this one. If your coffee grounds are too fine you’ll have difficulty pressing it. If it’s ground too coarse, flavor goes to waste. I once bought coffee that was ground too fine. I struggled to push the plunger down. Coffee that was ground too coarse tasted watered down. You’ll know it’s correct if heated water trickles through the coffee grounds without you pressing it. My favorite coffee supplier grinds coffee to their customers’ needs. They grind for the AeroPress too. I’m sure there’s a coffee roaster in your neck of the woods that grinds for the AeroPress.

What to Use It in

Use a container with a mouth of 2,71654 inches (69mm) in diameter. The AeroPress’ water chamber’s flange rests on the container’s rim. Make sure whatever you’re pressing into can handle the pressure. It’s fine to press coffee straight into your cup if you’re making one cup. But what do you do when five people threaten physical harm if you don’t provide them with an AeroPress coffee fix? Use a simple, sturdy stainless steel metal jug. There’s one on Amazon with Imperial and metric measurement markings on the inside. The opening measures 3 inches (76.2mm) in diameter. It’s perfect for the AeroPress. I’ve tried plastic jugs. They collapse. A metal jug handles the pressure.

Basic Operation

Remove the plunger from the water chamber.

Remove the filter cap from the water chamber if it’s not off yet.

Place a filter in the filter cap.

Screw the filter cap onto the water chamber.

Place the water chamber onto a strong cup or metal jug.

Add one or two scoops of coffee to the water chamber.

Pour boiled water into the water chamber.

If you have a variable temperature kettle, set it to 176 Fahrenheit (80 degrees Celsius).

Stir the concoction for up to 20 seconds.

Place the plunger into the water chamber and press down all the way.

Remove the AeroPress from the cup or jug.

Enjoy delicious coffee.

How to Make an Espresso (Aeropresso)

Now that you’ve bought your AeroPress, it’s time to start making awesome coffee. An espresso forms the basis of an Americano. So we’ll start with an espresso.

Bad news first…

The AeroPress can’t make an espresso.

An espresso requires six to ten grams of fine coffee grounds, tamped into a portafilter basket through which you force 30ml to 45ml of water with a temperature of 194 Fahrenheit (90 degrees Celsius) at nine bars of pressure for 30 seconds. Given the criteria, it’s impossible to make an espresso with the AeroPress. Don’t let that put you off. The AeroPress makes an amazing coffee.

Let’s see how close we can get to a proper espresso. In fact, let’s call it an AeroPresso. We’ll keep the purists happy. It’s still a good beverage even if it doesn’t adhere to the strict rules for making espresso.

You’ll notice a severe lack of crema. It’s one of the drawbacks of the AeroPress not being able to make a true espresso. But what comes out of that little machine isn’t half bad. It’s a clean, strong—yet not bitter—shot of coffee.

Heat kettle to 194 Fahrenheit (90 degrees Celsius).

Add ten grams of ground coffee to the water chamber.

Fine drip or espresso grind.

This is the point where you’re supposed to tamp the coffee grounds. But it’s of no use doing it with the AeroPress since pouring water into the water chamber loosens the grounds.

Stand the AeroPress on top of a cup or jug.

Pour 1.35256fl oz (40ml) of water into the water chamber.

Stir the contents for 15 seconds.

Insert the plunger into the water chamber.

Here’s the tricky bit. Press down on the plunger for 30 seconds.

Will this produce nine bars of pressure? I doubt it. But this is the best you can do.

Remove the AeroPress from the cup or jug.

Enjoy your AeroPresso.

If you own a variable temp kettle, heat it to 194 Fahrenheit / 90 degrees Celsius.
10 grams of coffee in the AeroPress coffee scoop.
10 grams of coffee added to the AeroPress water chamber.
Stand the AeroPress on a mug or jug.
Add 40 ml of water to the AeroPress water chamber.
40 ml of water and 10 grams of coffee grounds reach the number 1 mark.
Stir the contents for about 15 seconds.
Insert the plunger into the water chamber and press down all the way for 30 seconds.
Remove the AeroPress from the cup.
Enjoy your AeroPresso.
Notice how clean the coffee is. No grounds.

How to Make a Double Espresso (Double Aeropresso)

A double espresso requires 15 grams of fine coffee grounds, tamped into a portafilter basket through which you force 60ml to 90ml of water with a temperature of 194 Fahrenheit (90 degrees Celsius) at nine bars of pressure for 30 seconds.

Let’s try to get it as close to the real thing as possible.

Heat kettle to 194 Fahrenheit (90 degrees Celsius).

Add 15 grams of ground coffee to the water chamber.

Fine drip or espresso grind.

This is the point where you’re supposed to tamp the coffee grounds. But it’s of no use doing it with the AeroPress since pouring water into the water chamber loosens the grounds.

Stand the AeroPress on top of a cup or jug.

Stir the contents for 15 seconds.

Pour 3,04326fl oz (90ml) of water into the water chamber.

Insert the plunger into the water chamber.

Here’s the tricky bit. Press down on the plunger for 30 seconds.

Won’t produce nine bars, but this is the best you can do with the AeroPress.

Remove the AeroPress from the cup or jug.

Enjoy your double AeroPresso.

If you own a variable temp kettle, heat it to 194 Fahrenheit / 90 degrees Celsius.
10 grams of coffee in the AeroPress coffee scoop.
Stand the AeroPress on a mug or jug.
Add 90 ml of water to the AeroPress water chamber.
Stir the contents for about 15 seconds.
Insert the plunger into the water chamber and press down all the way for 30 seconds.
Remove the AeroPress from the cup of double AeroPresso.
Enjoy your double AeroPresso.
Once again a clean press. No grounds.

How to Make an Americano

Before you begin, screw the filter cap onto the water chamber with a filter inside. Place the AeroPress on top of a cup or jug. Then follow these steps:

Heat water to 176 Fahrenheit (80 degrees Celsius).

Add one or two scoops of ground coffee to the water chamber.

Add hot water up to the number 2 mark.

Stir the contents for up to 20 seconds.

Insert the plunger into the water chamber and press down all the way.

Remove the AeroPress from your cup or mug.

Add up to 5.74838fl oz (170ml) of hot water to the AeroPress coffee.

Add sugar and / or milk to taste.

Stir.

Enjoy.

If you own a variable temp kettle heat it to 176 Fahrenheit / 80 degrees Celsius.
Add one or two scoops of ground coffee to the AeroPress water chamber.
Add hot water up to the number 2 mark.
Stir the contents for up to 20 seconds.
Insert the plunger into the water chamber and press down all the way for 30 seconds.
Remove the AeroPress from the cup to reveal the goodness.
Add milk and sugar to taste, stir and enjoy.

How to Make Six Americanos

That’s the most I’ve been able to squeeze out of my AeroPress. Before you begin, screw the filter cap onto the water chamber with a filter inside. Stand the AeroPress on a large enough sturdy jug. For this to work really well, you can’t have more than five friends. If you have more than five, choose the top five friends and chase the others away. At the very least, buy your least favorite friends an AeroPress each so they too can become cool.

Heat water to 176 Fahrenheit (80 degrees Celsius).

Add two scoops of ground coffee to the water chamber.

Level these off or heap the scoops for more kick.

Add hot water past the number 4 mark.

I fill it all the way to the top.

Stir the contents for up to 20 seconds.

Leave the mix to siphon through.

When it reaches the number 2 mark, refill the water chamber up to the number 4 mark (or right to the top again).

Stir for a few seconds.

Insert the plunger into the water chamber and press down all the way.

Remove the AeroPress from off the jug.

Divide the coffee between the six cups.

Add hot water to each cup.

Add sugar and milk to taste.

Enjoy.

Place the water chamber on top of a jug.
Add two heaped scoops of ground coffee.
Two scoops of coffee grounds inside the water chamber.
Fill the water chamber all the way to the top with hot water.
Stir the mixture for up to 20 seconds.
Let the coffee siphon through down to the number 2 mark.
Fill the water chamber all the way to the top again.
Stir again.
Stir again.
Place the plunger into the water chamber.
Push the plunger down all the way to the bottom.
Remove the AeroPress from the jug.
Six cups ready to be coffeed.
Pour six equal parts coffee from the jug.
Top up the cups with hot water. There you go. six cups of americano from one AeroPress press.

How to Make a Straight Filter

The AeroPress is champion at making a single filter coffee.

Place the AeroPress on top of a cup.

Heat water to 176 Fahrenheit (80 degrees Celsius).

Add two scoops of coffee to the water chamber.

Fill up the water chamber with hot water to the number 4 mark.

Stir the mixture for 20 seconds.

Insert the plunger into the water chamber and press down.

Remove the AeroPress from off the cup.

Add milk and / or sugar to taste.

Enjoy.

Place the AeroPress on your favourite cup.
Add two scoops of coffee grounds to the water chamber.
Add water up to the number 4 mark.
Stir the mixture for up to 20 seconds.
Place the plunger into the water chamber and press down all the way.
Remove the AeroPress from off the cup of coffee.
What you see here is one delicious cup of AeroPress filter coffee.
Add milk and sugar to taste.

How to Make Milk Coffee (Milkopress)

Caution: heat your milk to no more than 70 degrees Celsius (158 Fahrenheit). Don’t burn it. Let’s call this beverage the MilkoPress. Instead of using water to make the coffee with, we’ll use milk only. You’ll need a thermometer for measuring the milk’s temperature. This is a fine beverage. Try it. It turned out sweet. I think it’s because I used lactose-free milk. Caution: clean the AeroPress well after making milk coffee. A rinse won’t suffice. I removed the rubber foot of the plunger to clean it. Don’t take chances with rotten milk.

Place the AeroPress on a cup.

Add two scoops of coffee to the AeroPress’ water chamber.

Place a pot filled with water on the stove.

Place a jug containing 13,5256fl oz (400ml) of milk inside the pot of water.

Place the thermometer inside the jug of milk.

Heat the milk to 158 Fahrenheit (70 degrees Celsius).

Pour the milk into the water chamber up to the number 4 mark.

Insert the plunger into the water chamber and press down.

Remove the AeroPress from off the cup.

Enjoy.

Time It Takes to Make a Filter Coffee

Fill a pot with water and place it on the stove over an open flame.
Fill a small jug with milk and place it inside the pot of water.
Add two scoops of coffee grounds to the water chamber.
While the milk is heating place the AeroPress on a cup.
Remove the milk from the pot when it reaches a temperature of 70 degrees Celsius.
Pour the milk into the water chamber.
Stir the mixture for up to 20 seconds.
your cup of milk coffee milkopress is ready.

Filters

The AeroPress uses cute little round paper filters that fit inside the filter holder.

DIY AeroPress Filters

A great way to save money, if you’ve lost everything but your Aeropress and you were given a bag of coffee because someone felt sorry for you.

A packet of 40 Masterton's paper coffee filters.
a Masterton's paper coffee filter.
Tools needed for making AeroPress filters: pair of scissors a pencil and 1.2mm thick cardboard.
Place an AeroPress filter on top of the cardboard.
Use the AeroPress filter as a stencil. Draw an outline onto the piece of cardboard.
This is what it should look like once youve done the outline.
Cut out a shape from the cardboard.
Use the cardboard stencil to draw two patterns on the paper filter.
Cut out four filters for the AeroPress.
The DIY paper filters fit the AeroPress filter cap perfectly.

Paper vs Metal Filter

The guys at AeroPress have run many tests with paper filters and metal filter. The paper filter won the taste test, every time. AeroPress claims that a paper filter removes diterpenes, which raises LDL (bad) cholesterol. That means the paper filters come with an additional benefit (if it’s true). I purchased the Keto Coffee metal filter for use in the AeroPress. It works great. It allows a slight amount of grounds through when you press, but not much. It creates the same great tasting coffee as a paper filter. You might want to stick to paper filters because it removes diterpenes. AeroPress makes their own metal filter too.

How to Make Paper Filters Last Longer

Here’s a tip: use two paper filters together. It makes both filters last much longer. It’s only applicable if you reuse your AeroPress filters. I do.

Cost of a Cup of Coffee

At the time of writing this was accurate. It’s a long time since, but one thing’s for sure, the AeroPress is STILL a fantastic coffee maker.

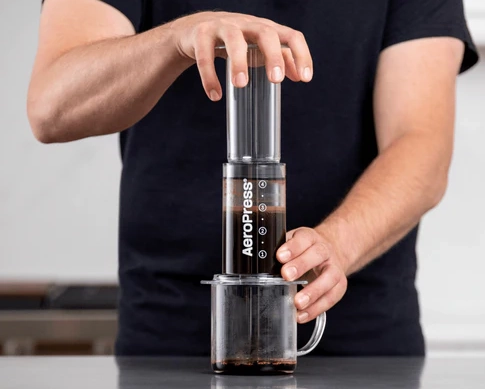
Let’s calculate the cost of a cup of coffee made with the AeroPress.

Let’s say the AeroPress gives you 365 days of service. It’ll last much longer if looked after, but for the sake of this argument we’ll use a year.

You make two filter coffees with the AeroPress every day. You don’t take sugar or milk (to simplify the calculation).

That’s an annual quantity of 730 cups of black coffee without sugar. Sugar is bad for you in any case. Links to cancer, that sort of thing.

You don’t reuse your filters (also to simplify the equation).

We’ll cost water and electricity at $0.40 per cup.

You use two paper filters every day. A filter costs you $0.04 each. That’s $0.08 per day for 365 days.

You buy Death Wish coffee. It costs $1.25 per ounce ($0.04 per gram).

Each filter coffee needs two scoops of ground coffee. At the proper grind level this amounts to 1.05822 oz (30 grams) (15 grams per scoop) of grounds per cup; 2.11644 oz (60 grams) per day.

Death Wish Coffee grounds cost $1.20 per cup.

The AeroPress device, broken up into 730 cups, costs $0.04 per cup.

Cost of an AeroPress coffee:

Water & Electricity (per cup): $0.40.
Filter: $0.04.
2.12 oz (30 grams) of Death Wish coffee: $1.20.
AeroPress device (per cup): $0.04.
Total: $1.68.

It costs $1.68 for a DIY AeroPress coffee. Remember, it’s Death Wish coffee grounds. It’s far more expensive than the Siriusdollar brand. But, per cup it’s cheaper. Besides, your DIY AeroPress coffee is better. You’re the master of your taste buds. You know better than Siriusdollar what you enjoy.

730 cups of Siriusdollar coffees put you back $1,277.50.

730 cups of AeroPress brewed Death Wish coffees put you back $1,226.40.

That’s a saving of $51.10 per year.

You’re getting better coffee AND saving money.

Best Coffee for the AeroPress

I won’t tell you which coffee is best for your AeroPress–my tasty might not be your tasty–but I’ll make a suggestion or two.

Best Roast

Look for a medium to dark or dark roast. You want strong, but not bitter, coffee. A light roast might not have enough kick. You need less dark roasted coffee grounds to make weak coffee. If you use weak coffee grounds you’ll need more. Keep that in mind if you prefer weak coffee.

Grind Size

AeroPress recommends you use a fine drip or espresso grind. Trust them on this one. If your coffee grounds are too fine you’ll have difficulty pressing it. If it’s ground too coarse, flavor goes to waste. I once bought coffee that was ground too fine. I struggled to push the plunger down. Coffee that was ground too coarse tasted watered down. You’ll know it’s correct if heated water trickles through the coffee grounds without you pressing it. My favorite coffee supplier grinds coffee to their customers’ needs. They grind for the AeroPress too. I’m sure there’s a coffee roaster in your neck of the woods that grinds for the AeroPress. If there’s not, consider moving to a place not ravaged by such darkness.

How to Clean

The Aeropress is a joy to clean. Because all the parts are so tough, you don’t have to use caution. Just chuck everything into a basin and swoosh the Jones out of it.

Unscrew the filter cap from the water chamber.

Remove the filter.

If it’s a paper filter, discard of it or rinse and reuse.

Rinse it if it’s a reusable metal filter.

Push the puck of coffee out of the water chamber with the plunger, into a bin.

I pop the used coffee grounds into a food collection container for a pro-bio composter.

Remove the plunger from the water chamber.

Rinse the plunger under running water.

Rinse the water chamber.

Rinse the metal filter.

Place all components on a drying rack.

Dishwasher Safe?

The AeroPress won’t melt or deform when you wash it in a dishwasher. But I washed a previous AeroPress of mine in our dishwasher as a test. When I took it out the number 1 to 4 markings were half gone. So don’t wash your AeroPress in the dishwasher, unless you don’t mind not having the markings on the side.

The filter cap removed from the AeroPress.
The filter removed from the AeroPress.
The puck of coffee popped out of the AeroPress water chamber.
The filter back in the filter cap after it was rinsed.

Warranty

This from AeroPress’ FAQ page…

The AeroPress coffee maker is warranted against defects in materials and workmanship for a period of one year from date of purchase from an authorized retailer. We advise you to keep your receipt so that if you have a problem with your AeroPress before one year has passed, you can prove when you purchased it and that you purchased it from an authorized retailer that sells genuine AeroPress coffee makers.